Seed starting

Seed starting is actually a lot easier than most people think. About 3 weeks ago I gave a little demo to some friends at work, and they each got to plant their own tomato seeds during the demo. I'm delighted to say that each one now has baby plants!
All you need to start seeds indoors is: seed starting soil, a container , seeds, a misting bottle with tap water in it, and a way to keep moisture in the container. In the demo we used small plastic cups with a larger plastic cup on top as a dome to keep in moisture. Since I start a lot of seeds, I use Jiffy cell refill packs. Each package as seen above has eight separate trays, with 9 cells in each tray for a total of 72 cells.
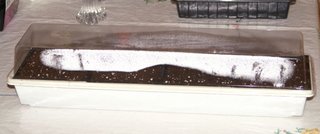
Seed starting soil can be bought at any garden center or Wal*Mart or Kmart or similar stores. No long discussion needed for that! Then you need your seeds, of course, and a way to keep moisture in while your seeds are germinating. I use little plastic greenhouses that also come from garden centers or discount stores. Some are black and square, some are white and long but they all should come with a plastic dome that fits on top of the tray to keep moisture in. The Jiffy cells fit perfectly in each of these; 4 in each.


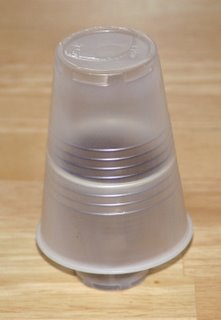
For just a few seeds, you can create your own individual mini-greenhouses from 3-oz plastic cups topped by 5-oz plastic cups as shown below. Make sure to punch a couple of drainage holes in the bottom of the small cups because your plants will stay in that cup for a few weeks and you will have to water them.

So how do you actually start seeds, and when? Plan on starting tomato seeds about 6-8 weeks before putting them in the ground. In Connecticut we put them into the ground at the end of May so late March or early April is a good time for me to start the seeds.
Put seed starting soil into your container. Fill each Jiffy cell almost to the top but leave just over 1/4 inch. Knock the cells lightly down on the table 4 or 5 times to settle the soil because seed starting soil is very loose and light. In a week or so, when you start watering, if the soil is too loose it will shift when you water so we want to pack it just a little tighter in the beginning. Add more soil if necessary to bring the top of the soil within 1/4 inch of the top of the cell. Put your seed in the middle of each cell. You can give the seed one or two sprays from the mister, just to get a little moisture on the seed. Moisture (and warmth) is what triggers the seed to sprout. Cover it with about 1/4 inch of seed starting soil, just about to the top of the cells. Give a few more sprays from the mister to make the top of the soil rather damp. I usually give about 15 or 20 sprays, but we are talking about mist here, not a waterfall! This is all the water your seeds will receive until they sprout. Place the container into one of those greenhouses and put the lid on. Put the plastic greenhouse away from direct sun but in a warm spot in your house. Then, just wait for about a week! Your seeds should sprout in 5-10 days.
I usually put two seeds into each cell just in case one of them doesn't germinate. If both seeds germinate, I pull the weaker one or the one off-center and leave the better one. I'd rather waste seeds than space. A cell without a seedling is a waste of space.
Once they sprout, they must be put into direct sunlight or fluorescent light right away. If they are put in a sunny window, turn your container every couple of days so that the plants don't lean just one way reaching for the light. In the next post, I'll show you my fluorescent light setup in the basement. Sadly, I don't have a good windowsill with sun, so I have to manufacture light, but there are advantages to that as well.

0 Comments:
Post a Comment
<< Home